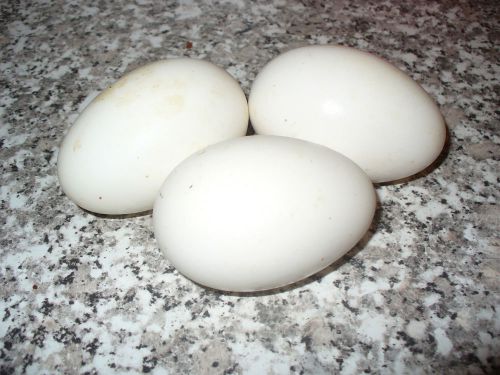
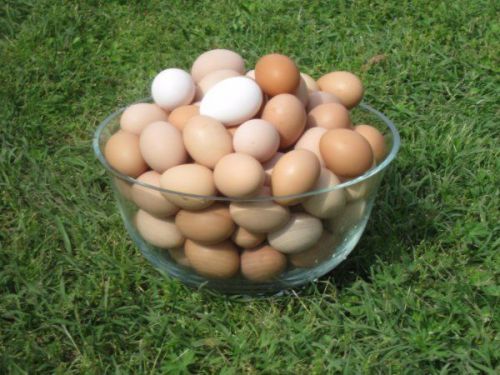
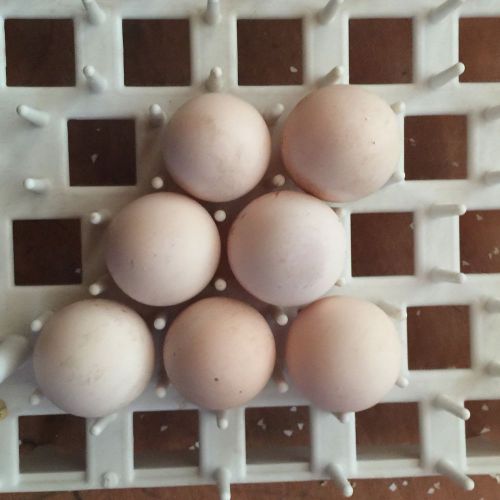
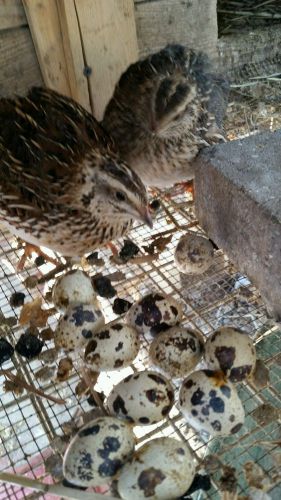
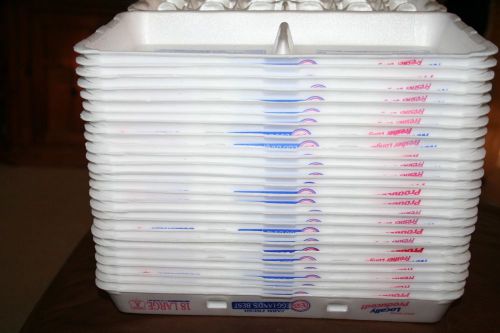
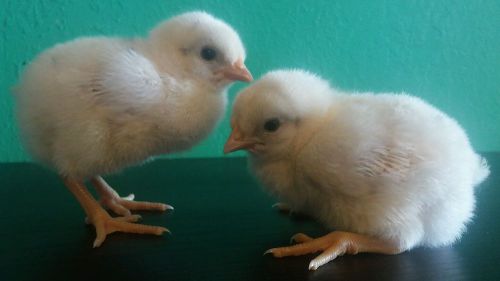
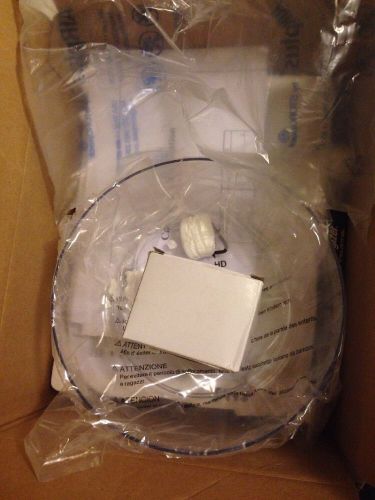
WELCOME TO STORAGE COLLECTION (*_*) >PLEASE READ< BEFORE PLACING YOUR ORDER 3-GOOSE EGGS plus 1 EXTRA egg HATCHING EGGS. THIER NAME IS AFRICAN GEESE. We appreciate your business! We’d like to make ordering hatching eggs a predictable and pleasant experience for all our customers. All orders from are subject to the following terms and conditions, and any purchaser of eggs or products from us agrees to these terms and conditions as a prerequisite of ordering. There are no exceptions to these terms and conditions, so please read them carefully and be sure you are willing to abide by them before ordering. If you are unwilling to abide by them without complaint, please do not place an order. I cannot stress enough how important it is to be prepared before the incubation of any egg and will broadly state that ANY egg will do much better if left in the care of reliable parents for at least 66% of the incubation period. Your work for viable eggs starts with sound husbandry and care of your breeding stock as Im a firm believer in the old saying that 'you only get out what you put in'. Egg weighing and Egg Marking. It is best to do your research on your breed or species incubation requirements before setting the incubator. For example it appears African and Chinese geese have eggs which lose moisture more readily than Sebastopols and Dewlaps. Therefore their humidity requirements will be higher, perhaps 45-55% humidity. Chickens and Ducks have a slightly higher optimum incubation temperature of 37.5C where geese benefit from being a little lower. A little research before incubation pays dividends later. However, I have and still do mix eggs in incubators and try to provide average conditions. Therefore I run a dry incubator and another at average humidity to accommodate most needs of the eggs Im hatching. Overall Im looking for eggs to lose approx. 14-17% of their fresh laid weight by External Pipping to produce healthy hatchlings. For example, if a fresh laid Toulouse egg weighs 150 grams then its needs to lose 22.5 grams by approx Day 28 to achieve a 15% weight loss. This would be a weekly weight loss of 5.6 grams. By checking weekly weights the eggs humidity can be adjusted accordingly so the target weight is achieved. I have to admit that after all these years I now tend to assess weight loss visually by checking the size of the developing air cells but its not as precise as weighing. However where moisture loss is suspect then I will weigh these eggs for an accurate measurement. So for my example Im explaining the conditions for Dewlap Toulouse eggs so the incubation requirements are as follows; Temp 37.3C, Humidity 20-25% (dry incubation), vents fully open, hourly auto turning after 24 hours with a once daily hand turn of 180 degrees. After 6 days I start daily cooling and misting for 5-10 minutes increasing to 15 minutes daily from 14 days until Internal Pipping. Eggs are weighed weekly to check they are losing adequate moisture. The technique of cooling and misting of the eggs remains controversial though other experienced breeders have employed these techniques (Ashton 1999, Holderread 1981). There appears no clear rationale how this benefits the growing chick though some consider the cooling as beneficial to the chicks stamina. In relation to moisture loss it appears that as the egg cools to the room environment then heat is lost from the egg. It may be argued that rapidly escaping heat from the pores of the eggshell also carries water and gas molecules with it. Certainly there is evidence that daily cooling appears to improve hatch rates in domestic geese. The misting of eggs with tepid water at first appears illogical in stimulating water loss but this may increase further heat loss by evaporation. I like to set the eggs in at least batches of 4-6 which usually ensures there is very good chance there will be more than one hatchling. The eggs are incubated in a horizontal position and not turned for the first 24 hours, after that the auto turn mechanism is switched on. In the very early stages of the embryos development it is crucial that optimum and stable conditions are maintained. During this time the embryo grows from a simple cluster of cells to a basic embryo with a supporting cardio-vascular system. Not only is this a period of major physiological change but also a time of rapid bio-chemical processes as cells divide and migrate to their pre-programmed positions to form the basic structure of the embryo. The bio-chemical processes are complex and include converting iron stores to haemoglobin to establish a vascular system and also conversion of nutrients to fuel this whole process. It is in this 5 day period that the early embryo is so fragile and any mistakes in incubation can result in an early embryonic death. With this understanding it can be clearly understood why stable incubation is required. Temperature swings only serve to slow down or speed up these complex processes and lead to major disruption. It is therefore vital that the incubator is run in for days before setting the eggs as changes at this time should be avoided. Often an incubator will produce temperature spikes when eggs are introduced. To avoid this I fill the incubators with infertile fresh eggs which are gradually replaced by fertile ones as more eggs are introduced. This solved the fluctuations in temperature I was having and provided the stable conditions I required. So the eggs are now set and have been incubated in stable conditions. At 5-6 days I candle the eggs and determine which are fertile. The eggs remain in the incubator and the candler is positioned over the air cell (blunt end) to illuminate the contents of the egg. If you look carefully at this stage there should be a red 'dot' about the size of a match head with faint blood vessels surrounding it. Those eggs without any indications of fertility should be re-candled at 10 days and thrown if they're infertile. Appearance of an infertile egg (left) and a fertile egg at 4 days incubation (right) Appearance of fertile eggs at 5 days (left) and 6days incubation (right). Once the basic embryo has developed then more complex cardio-vascular structures grow which act as the embryo's life support systems. A system of blood vessels grows out over the yolk sac to supply the nutritional needs of the growing chick while the body is encased in an amniotic sac filled with amniotic fluid. This sac serves to protect the fragile growing embryo and its delicate tissues by bathing it in amniotic fluid. A further sac develops from the naval area and rapidly grows as a vascular balloon which encases the chick, the yolk and amniotic sac. This 'balloon' is covered with an intricate and generous supply of blood vessels leading directly back to the chick. Over the next two weeks the Chorio-Allantoic membrane grows to completely line the inner surface of the entire egg-shell. As the membrane and its blood vessels lie adjacent to the shell it places the blood vessels in near contact with the pores of the egg-shell. Therefore gas and moisture exchange can occur ridding the embryo of carbon dioxide and excess water molecules and also absorbing oxygen for the growing chicks needs. This vital membrane meets the growing embryos internal respiration needs until it is mature enough to use its own lungs for pulmonary (lung) respiration. Research has shown that inadequate turning of the egg in the first two thirds of incubation can lead to stunting in the development of the chorio-allantoic membrane. This would reduce the membrane's ability to provide adequate gas and water molecule exchange to meet the growing chicks needs and lead to a late death at approx the third week of incubation. The chorio-atllantoic membrane has almost grown to cover 66% of the inner surface (left). By half way through incubation the membrane entirely lines the shell and has developed major blood vessels to supply respiration, fluid and protein needs (right). Once the basic form of the bird has been developed the remaining part of incubation is simply about growth and maturing the chick until it is capable of independence free from the egg. Incubator conditions should remain stable and a regime of daily cooling and misting of the eggs maintained. There should be continued monitoring of the eggs weight loss and therefore development of the air cell which provides a visual reference of moisture loss. HATCHING This appears to be one of the most controversial topics about incubation and yet although complex can be easily understood. The chick does not randomly hatch - there is nearly always a set sequence and process to follow. Once this is understood then hatching and management of hatching eggs becomes clearer. By the 24th to 27th day of incubation (depending on breed) the egg should have lost approx. 13% of its weight and the air cell should be of a good size. The air cell should be slightly slanting downwards. At this point the eggs should be candled daily to determine their progress. Within a 24 hour period the air cell appears to suddenly dip downwards and appears to have grown noticeably in size. It often takes up a distinctive dipped shape and becomes easily recognisable. Graphic of candling in late incubation showing dark mass and vascular detail to just below the air cell. Actual image of Dewlap Toulouse egg at 25 days incubation (right). The egg is now out of balance and no longer needs turning. If the egg is placed on a smooth surface it will always roll to the same position which is the side with the greatest amount of air cell uppermost. This now becomes the top of the egg and a cross marked on the shell so the egg always remains in this position. The chick is now lying in its optimum position for hatching and will find manoeuvring into its final hatching position easier to achieve. The sudden change in size and shape of the air cell is caused by the chick changing its position within the egg. During late incubation the chick normally settles into a position with its head bent over and pointing towards its tail. To encourage correct positioning I incubate the eggs on their sides with the blunt end slightly elevated at a 20-30 degree angle. Again this mimics the position of many eggs in nature as they lie in the concave of the natural nest. At this point my incubation settings remain unchanged for temperature and humidity, the only change is the eggs are now placed in their final position and turning stopped. Garaphics showing the distinctive appearence of the air cell at 'dip down' and the correct position to place it in on the incubator floor. Within another 12 -24 hours of dip down of the air cell there will be shadows become visible within the air cell. These start at the back of the air cell and over a further 12-24 hours gradually extend down the sides and finally along the front of the air cell. On candling there is often movement visible of the shadows. This change is due to the chick gradually moving into its final hatching position. It gradually draws its head up from a position facing its tail and upwards towards the air cell. When viewed from the air cell end of the egg the chicks head is turned towards the right and under its right wing. With the head and beak lying adjacent to the air cell membrane the chick is ready for internal pipping. As the chick is almost fully mature the chorio-allantoic membrane is unable to fully meet the chicks respiration requirements. Oxygen saturation levels fall slightly and Carbon Dioxide levels begin to rise. Often this change in the failing chorio-allantoic membrane can be seen on candling as previously visible red blood vessels appear to take on a darker red colour. The change in blood gas levels is thought to provoke involuntary muscle contractions which have a two-fold effect. The large hatching muscle located on the chicks neck begins to contract with force and results in the chicks bill piercing the inner membrane of the air cell. This is further helped by a tiny sharp harder area on the tip of the upper bill (the egg tooth). With a hole in the air cell membrane the chick is finally in a position to commence breathing using its lungs. Starting with occasional breaths a regular pattern of pulmonary respiration soon becomes established. Internal pipping has now been achieved and a major physiological change has occurred. Internal pipping can be verified in two ways; often the shadows visible in the air cell on candling appear to pule rhythmically and if the blunt end of the egg is held to the ear a faint click clickclick sound can be heard. Graphics showing the appearence on candling of the start of 'Shadowing' from the side and front view of the egg. Graphics & Picture showing the appearance on candling of the progress of 'Shadowing' and 'Internal Pipping' viewed from the side and front of the egg. It is in this phase of hatching that many chicks die resulting in late dead in shell. It is a time of great stress and physiological change within the chicks body. The heart is pumping rapidly due to exertion and trying to compensate for changing blood gases. It is my opinion that inadequate moisture loss during incubation causes the chick and its supporting cardio-vascular system to be overloaded in fluid. With the heart having to pump faster and harder to compensate the chick goes into heart failure. The tissues in the body become swollen with excess fluid (oedema) and the chick weakens. The space for manoeuvring into its hatching position becomes even tighter and the chicks body is simply too weak to withstand the vital changes required. It is now clear why monitoring egg weight loss is so important! I also incubate exotic and rare species of birds and every chick is vital. Therefore if I am concerned in any way about the chick or external pipping is delayed then I intervene. Using a sterilised tiny sharp drill bit I carefully enter the air cell at the centre and very top of the egg. I check using the candler that the chick is not directly below the proposed point of entry. By twisting the drill bit by hand the egg shell is gradually eroded away and a hole approx. 2-3mm diameter is made. This safety hole provides access to fresh air and needs to be no larger or premature drying of the membrane will occur. I have called this artificial external pipping. This safety hole has saved the lives of many healthy chicks over the years. I can recall instances of baby parrots successfully external pipping then going into rotation within the egg until their body occluded the external pip area and then died! Very annoying and upsetting to be so close to a successful hatching! Graphic showing the position of the safety hole to achieve 'Artificial External Pipping' (left). A baby Macaw progresses to sucessful rotation despite a safety hole being made earlier (right). With the chick successfully internally pipped it can breathe easily and rest for a while. However the oxygen within the air cell is soon used up. After about 6-24 hours the chicks bill begins to strike upwards against the egg-shell. This repeated jabbing action results in the breaking of the egg-shell over a small area and appears either as a small raised pyramid, a cracked area or even a hole. The chick has now externally pipped and has access to free air to meet its respiration needs. It is only at this point do I change incubation conditions. I try to lower the temperature about 0.5C and increase the humidity to 65-75% (lockdown). (Left) - Graphic showing appearence on candling of 'External Pipping'. In most normal hatches the 'pip' is made in the upper quadrant of the pencil marked cross. (Right) - A Macaw egg is candled showing the size of the air cell, the shadowing and external pip mark. It is now that the chick enters its latent phase and it appears as though there is little progress. This phase can last from 6-72 hours depending on species or breed incubated. Gradually the chick becomes more vocal as the lungs finally mature. Apart from the constant clicking noise from breathing the chick will occasional whistle or peep. It is vital to point out that the clicking or tapping noise is NOT the chick tapping against the shell trying to release itself. Many owners nerves are shredded at this stage and they misinterpret the noise and prematurely intervene with disastrous consequences! To reassure the reader I advise putting your chin on your chest and try forcibly breathing in and out. In this position you can mimic the clicking noise which is actually caused by the chicks head being bent and made in the pharynx as it breathes. While the chick rests during this quiet phase it is preparing for its final hatching sequence. By changing pressure in the thorax and abdominal contractions the yolk sac is drawn inside the abdominal cavity. Meanwhile the lungs have finally matured and the job of the chorio-allantoic membrane becomes redundant. The blood vessels start to gradually close down and recede into the chicks navel. If the owner prematurely assists before this stage they will usually cause haemorrhage from the still active blood vessels and find the yolk sac unabsorbed. Graphic showing the almost mature chick that may have externally pipped but still with the yolk sac unabsorbed and the major blood vessels still active. It is this stage that owners find so difficult to judge and when intervention is both necessary and safe. We do not follow the school of thought that chicks that are unable to hatch are best left due to a weakness in the chick or their bloodline. This sweeping and erroneous statement does not account for healthy chicks previously hatched from the same parents. Hatching delays are often the result of slightly imperfect incubation techniques and this should be taken into account. Yes, sometimes chicks are weak and there is often mortality under the parents, nature does select for the strongest. However if we are to employ artificial incubation techniques then we must accept that as owners we are capable of making errors and at least give these chicks the opportunity of life before assessing their worth later. This is especially so in the incubation of endangered species or rare breeds when every egg counts. The final phase of incubation is finally reached once the yolk sac and blood in the vessels have been absorbed into the chicks abdomen. The egg and its structure has completed its purpose and the chick must now release itself from the shell. If viewed from the blunt end of the egg the chick suddenly starts chipping around the shell in an anti-clockwise direction. This is called rotation or unzipping and it is a relatively quick phase. I have seen chicks rotate around the entire shell in less than ten minutes but usually it is completed in 1-2 hours. By the actions of chipping at the shell and pushing of the feet the chick works around the circumference of the egg until it has gone almost 80% around. At that point the egg weakens and with a pushing action the cap of the shell hinges open allowing the chick to scramble free from the egg. The chick is then taken and its navel area is sprayed with dry iodine powder then placed into a clean container to rest. This action dries any slight bleeding as the powder coagulates and helps to minimise the risk of navel infection. The chick is then left to recover rest and dry out thoroughly before being transferred to its rearing unit. A baby Macaw that had internally and externally pipped. The shell was (right) opened to show the chick in the normal hatching position. Note all the blood vessels have receeded from the membrane and the chick is now ready to hatch. Predicting when the chick is ready for final release and if assistance is required is fairly easy. The essential tool required is a good quality candler (and a dark room to view in). After external pipping the yolk sac and blood vessels are still to be absorbed. If the egg is candled through the air cell and around its low point at the front then there will only be a little detail visible. The dense yolk sac appears as a dark mass though the major umbilical vessels may be seen. This is more easily achieved in white and thin shelled eggs and incubating white chicken eggs is an excellent way to practice your techniques. As the yolk sac and blood is absorbed a hollow void appears in the area below the lowest point of the air cell. The light from the candler clearly illuminates this void area. Now it is safe to assist and you should prepare buy sterilising your hands and instruments using alcohol hand gel. Working from the top of the air cell where an artificial external pip hole may have been made pieces of shell can be gradually removed. It is safe to work down to the demarcation line of the air cell which should be outlined in pencil to guide you. Once a hole has been enlarged sufficiently for you to work in then the situation can be assessed. Do not remove any more shell than necessary. Using a Q-tip moistened boiled cooled water (or sterile saline) the membrane over the chick can be moistened directly. Check the position of the beak and ease the membrane away by stretching rather than tearing if possible. If no bleeding occurs continue gradually easing the membrane away until the chick is exposed. The membrane around the chick is gradually eased away from the beak and outwards to the edge of the membrane finally exposing the chick. Graphics showing the appearence on candling of the unabsorbed yolk and blood vessels (left) and absorbed yolk and vessels as a 'hollow' void appears (right) The aim here is a little progress at a time then after about 5-10minutes stop and replace the chick back into the brooder for another 30-60 minutes. This allows the chick to rest and warm through. It also allows the membrane to dry and shrivels any blood vessels a little further. Gradually the entire membrane is eased back and using the Q-tip the beak can be eased forward and over the right wing. At this stage the chick may start pushing with renewed vigour or you can ease the head up and out which will provide you with your first direct view down into the eggshell. Using your candler assesses and check the blood vessels have receded and the yolk sac is absorbed. If you have assisted too early then allow the chick to curl up its head and re-cap the egg. Infertile eggs are excellent for this purpose. They are broken in two and the top half cleaned of its membranes. The top has a safety hole put in it and the egg shell soaked in boiled water. This action causes the shell to be pliable and it can be trimmed just below the widest point so it provides a snug fit. After soaking again in hot water remove the cap, allow to cool and simply place over the chick in the shell. If necessary use surgical tape to hold it in place. You are now committed to a fully assisted hatch. Graphic showing the concept of 'Capping' in the event of premature assistance. After a few hours assess the situation again and repeat as necessary until you confirm absorption of the yolk sac and blood vessels. I then free the head and chest leaving the chicks abdomen in the remaining egg shell. Often the chick is exhausted but after being left in the hatcher for an hour or so they make final efforts to kick themselves free from the egg. In cases where they fail to do this they will come to no harm and can be safely left to rest. I often leave them this way overnight which allows the naval area to thoroughly dry and the chick may be safely removed from the shell. (Left) - The chick is now free and left to hatch itself and dry the naval area. (Right) - 1 hour after releasing the head and chest the chick finally scrambles free from the remaining egg. Although I have made some controversial and unusual comments these are my opinions. I have shared my knowledge and experience with you to help your chicks and improve success rates. Please respect the work I have done and do not copy my images or texts. Your feedback would be greatly appreciated and your opinions as Im considering if this work is worth sending to magazines for publication. Good luck with your eggs and incubation. Two healthy Exhibition Dewlap Toulouse goslings 18 hours after hatching and the end result of applied artificial incubation techniques. I HAVE TRIED TO DESCRIBE THIS TO THE BEST OF MY ABILITY, Delicate items are packed with extreme care and usually double-boxed if needed. **I will combine items to save on shipping. I will give as much information on each item that I can and Please ask questions before bidding and I will try to get an answer as soon as possible. I usually ship Priority Mail or Parcel Post to get your items to you safely and quickly. Should your item arrive damaged, you can file a online insurance claim. Please be patient on all accounts! I am very honest and reasonable and I am willing to work with anyone on all the items just ask before you bid. We join eBay in the assumption that people are basically good and honest and wish to push through with their commitment, if you do not wish to push through with your transaction, kindly communicate with us and let us know your reasons, if they are reasonable, we will not insist. We will however file eBay NPB cases against those who ignore us or give us weird reasons for not pushing through with the transaction, I've been buying and selling on eBay for 9 years or more. ONCE I HAVE PRINTED A SHIPPING LABEL AND SHIPPED YOUR ORDER YOU CAN NOT CANCEL THE ORDER. I'm a pretty easy person to get along with. However, I appreciate the cooperation of buyers. The buyer has 4 days to pay from the end of the auction. If the buyer has not paid by that time, we reserve the right to re-list the item or second chance the item to a different member. If anyone wants more pictures, let me know what you want pics. of and I will send get them out to you through eBay email. I am shipping from Missouri, USA Check out my other items! Be sure to add me to your favorites list! THANKS!! AND HAVE A HAPPY Ebaying!!! On Mar-14-16 at 07:09:44 PDT, seller added the following information: Much of the information available on incubating and hatching chicken eggs can be applied to ducks, as long as the important differences between these two species are taken into account. Since duck eggs are larger than chicken eggs, setting trays must be designed to accommodate their larger size. Eggs from common ducks like Pekins require 28 days to hatch. Eggs from Muscovy ducks hatch in about 35 days after setting. When larger numbers of duck eggs are to be hatched, large commercial incubators (setters) and hatchers are normally used. Pekin duck eggs are kept in a setter for 25 days and then transferred on the 25th day to a hatcher where they remain until they hatch on the 28th day. Eggs are automatically turned while in the setter (usually hourly). It is not necessary to turn eggs in the hatcher. Basic procedures and conditions for hatching duck eggs are as follows. 1. If the incubator is not already in operation, start the incubator and allow the temperature and humidity to stabilize a day or two before setting eggs. Set the temperature at 37.5°C (99.5°F) and relative humidity at 55% (84.5°F on wet bulb thermometer). Set ventilation as recommended by the incubator manufacturer. Eggs must be turned, either automatically or by hand, a minimum of 4 times a day. Most automatic turning devices are set to change the position of the eggs hourly. 2. Select eggs to be set by carefully inspecting and candling them at the time they are put in setting trays. Do not set eggs that are cracked, double yolked, misshapen, oversized, undersized or dirty. For best results, set eggs within 1-3 days from the time they were laid. There is an average loss of about 3% hatchability for eggs stored 7 days before setting, and about 10% loss for those stored 14 days. Always set eggs with the small end down, except in the case of small incubators that have no trays. If eggs have been stored in a cooler, take them out of the cooler the night before setting and allow them to warm to room temperature. 3. On the day of setting, put eggs in incubator, close the doors and allow the incubator to reach operating temperature. Check frequently to make sure the incubator is working properly the first day, and continue checking thereafter at least four times a day. 4. At about seven days after setting, candle the eggs and remove any eggs that are infertile (clear) or have dead germ (cloudy). 5. At 25 days after setting (Pekin eggs), the eggs are transferred to hatching trays, and if eggs are hatched in a separate machine, moved to the hatcher. Candle and remove eggs with dead embryos. At the time of transfer, the temperature of the hatcher should be set at 37.2°C (99°F) and the humidity set at 65% (88°F wet bulb). As the hatch progresses, and eggs begin to pip, increase the humidity to 80% (93°F wet bulb), and increase ventilation openings by about 50%. As the hatch nears completion gradually lower the temperature and humidity so that by the end of the hatch the temperature is at 36.1°C (97°F), and the humidity is at 70% (90°F wet bulb). Vents should be opened to their maximum setting by the end of the hatch. Remove ducklings from the hatcher when 90-95% of them are dry. Proper Water Loss During Incubation As the duckling develops inside the egg there is a loss of water from the egg and an increase in the size of the air cell. If the duckling is developing normally, the air cell should occupy about one-third of the space inside the egg at 25 days of incubation (common ducks). Weight loss can also be used as a guide. Common duck eggs should lose about 14% of their weight at time of setting by 25 days. Natural Incubation. Duck eggs may be hatched naturally by placing them under a broody duck or even a broody chicken hen. Muscovy ducks are very good setters, capable of hatching 12-15 duck eggs. The nest box should be located in a clean dry shelter, bedded with suitable litter. Feed and water should be available for the broody duck and for the ducklings when they hatch. Egg Storage If eggs are stored for a while before they are set, they should be stored at a temperature and humidity level that will minimize deterioration of the egg. For a small number of eggs, storage in a cellar may suffice. Whenever possible, store eggs at about 55°F (13°C) and 75% of relative humidity. Store eggs small end down.
By clicking "Accept All Cookies", you agree to the storing of cookies on your device to enhance site navigation, analyze site usage, and assist in our marketing efforts.