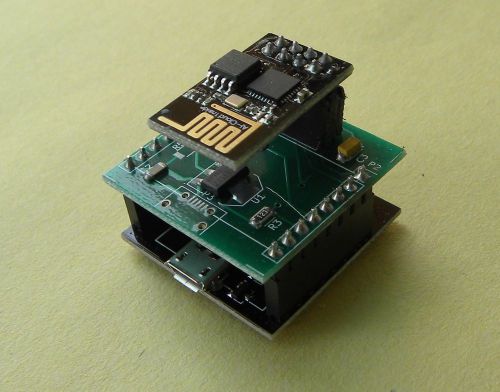
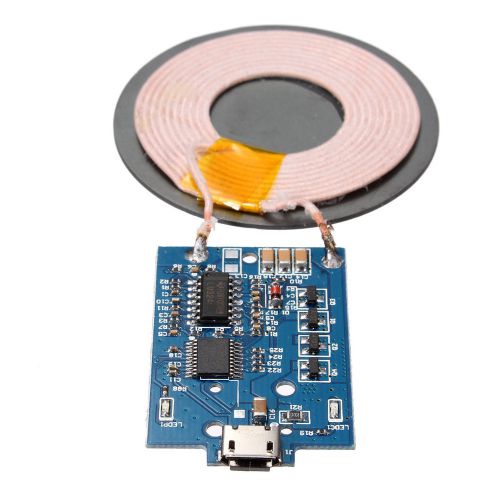
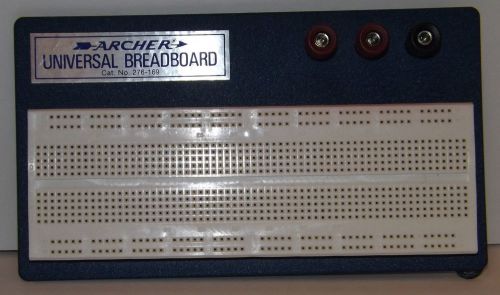
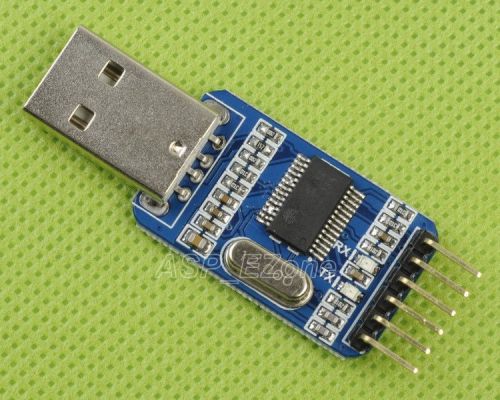
Swiss Army Knife for ESP-01 This is a unique, custom-built item that is sure to please all ESP8266 enthusiasts: a reliable programmer for the ESP-01 module allowing it to be just like a NodeMCU or with the Arduino IDE. It also doubles as a convenient breakout board for the ESP-01 for prototyping on the breadboard. The item consists of two boards mated together. This listing is only for these two boards and does not include the ESP-01 module. The bottom board has a USB connector and CH430G USB TTL chip. It bridges USB to UART/SPI. This allows your Windows/Mac/Linux PC/Laptop box to talk to the ESP-01 via USB. The top board consists of a 3.3V regulator plus header that directly mates to the ESP-01 module . By stacking the three boards – bottom board, top board and a ESP-01 – you get a complete development environment for the ESP8266. In fact, it becomes similar in all respects to other ESP8266 development boards such as the NodeMCU, WeMos D1 Mini, Witty. You can use tools such as NodeMCU Flasher and ESPlorer directly on this setup without having to do any other wiring. You can also use it directly with the Arduino IDE (after installing the necessary libraries). In this stacked configuration, you can power the ESP-01 from USB, reprogram the ESP-01, and debug your firmware via the serial console. The top board also acts as a breakout board/breadboard adapter for the ESP-01. Once you have programmed your firmware into the ESP-01, you can place the bottom board plus ESP-01 on the breadboard and tap out all the relevant pins for building your external circuit. You don’t need the bottom board for running your project. It is used mainly for reprogramming the ESP-01 and for debugging your firmware. Note that you need to mate two breadboards together after removing the bus strip from one of them to get this module to seat correctly. See the picture below for how this is done. Note: The listing does not include the ESP-01 module. You have to buy it separately. The ESP-01 shown in pictures accompanying this listing are for illustration purposes only. Use Cases Power your ESP-01 The top board comes with its own strong 3.3V regulator and tantalum capacitor. You can feed it anything from 3.3 to 15V, whether regulated or not, and the ESP-01 will gets it own stable 3.3V rail thanks to the regulator. Just make sure your power supply can produce 300 mA average and 500 mA peak. Reprogram the ESP-01 The CH340G on the bottom board translates from USB to UART allowing your computer (Windows/Linux/Mac) to transfer the firmware to the ESP-01. The RTS and CTS pins of the UART are used to place the ESP-01 in flash mode. So no need to press any buttons or change any jumpers for flashing. You can use Arduino IDE (just press “Upload Sketch”) or, if you have a binary firmware file, use the NodeMCU Flasher tool. See debug messages from your firmware The CH340G also allows you get debug messages back from your firmware and see it on your computer. If you are using Arduino, you can see these messages on the Serial Console. Alternatively, you can use ESPlorer tool for this purpose. Easily hard-reset the ESP-01 Since the CH340G RTS pin is connected to the ESP-01’s reset pin, you can simply toggle this using the ESPlorer interface to hard reset your firmware. Simply click-wait-and-click-again on the RTS button and your firmware will reboot. This trick also works on other ESP8266 development boards. FAQs We are a top-rated, super-responsive seller on eBay and are happy to answer any questions you have. Write to us using eBay’s “Ask Seller a Question” feature or simply email us at gadgets.matrix@gmail.com. Here we are including some background information to help you if this is the right product for you. What is the ESP8266? ESP8266 is a WiFi SoC made by a company named Espressif. Since its launch in late 2014, this little chip has captured the imagination of hobbyists and professionals alike in the field of IoT. It has an integrated Tensilaca LX106 32-bit microcontroller that can be clocked up to 160 MHz and is exposed via an SDK so that you may run your own programs on it, in addition to using its WiFi networking capabilities. Since it has a fair number of GPIOs, an ADC, SPI/I2C, 2 UARTs and PWM outputs, this means there is no need to add another microcontroller to most projects. The built-in micro has enough horsepower to run a full-fledged webserver, run a small file system, handle WebSocket connections etc., right on the ESP8266. All in addition to handling the WiFi, the TCP/IP (LWIP) stack, and the logic of controlling sensors and actuators connected to the chip! The ESP8266 is usually sold as a module, such as the ESP-01 or ESP-12, that integrates flash memory, WiFi antenna, and other discretes. What is NodeMCU? NodeMCU is an open source IoT platform and development board for the ESP8266. It uses the Lua scripting language. The official NodeMCU hardware platform is based on the ESP-12 module. What is the ESP-01? ESP-01 is the cheapest and simplest of the modules available for the ESP8266. It has a built-in antenna and flash memory (1 MB), but it does not have a voltage regulator or EMI shield. It has only 8 pins brought out to the connector and so has limited interfacing capabilities. How is the ESP-01 used? The ESP-01 can be used in two different ways. As a WiFI shield for another microcontroller The ESP-01 comes pre-flashed with a so-called “AT Firmware.” The AT Firmware expects the ESP-01 to be used a a slave device in which it passively listens to AT commands over its serial port. An external micro (such as a Arduino) can control the ESP-01 by sending appropriate AT commands. As a standalone microcontroller with WiFi capabilities Espressif also releases an SDK (or Software Develpment Kit) for the ESP8266. The SDK allow you to compile and run your own code on the ESP8266. Your custom firmware program can use the WiFI and other capabilities of the ESP8266 via a well documented API. Do I have to use the SDK to program the ESP-01? No. When the ESP8266 was launched, using the SDK was the only method to create a new firmware for it. Today the situation is different. You have multiple choices, so choose as per your convinience: Official ESP8266 SDK from Espressif: This is the most powerful option. You can compile and run native code on the Tensilca processor and make low-level calls to the SDK for specific functionality. It tends to create the fastest firmware with the smallest memory use. It is also the most involved and time-consuming option. You have to manually integrate your filesystem and OTA process (over-the-air update of firmware). Arduino: There is now a well supported project bringing ESP8266 into the Arduino environment. You can use the friendly, familiar IDE and API like digitalWrite() and setup()/loop(). It also exposes other functionality (such as for WiFI and OTA) via libraries. This is a great choice if you are already familiar with Arduino. NodeMCU/Lua: This is the fastest way to get started with ESP8266. The firmware image released by this project comes with everything you need: a filesystem, and HTTP server, and other high-level APIs. Lua is a scripted language and this firmware allows you to run multiple scripts placed directly in the filesystem. However, this also tends to be the slowest and most memory intensive way to run code on the ESP8266. It is therefore more suited to prototyping than for production firmware. Espruino: The Espruino project is a seperate effort to bring javascript support to Arduino and this environment has been ported to ESP8266 as well. It is worth checking out if you are familiar with Javascript. Sming: Another Arduino-like framework written in C++ PlatformIO: Yet another Arduino-compatible IDE with a more modern set of tools Can I reprogram the ESP-01 without this programmer? Yes, you can. Developers typically use one of the widely available USB-TTL modules and manually interface it to the ESP-01 in order to reprogram it. This is trickier than you might think. The ESP-01 has to first be placed in flash mode and then the firmware has to be downloaded. To enter the flash mode, GPI0, GPIO2 and CH_PD pins must be placed at an appropriate level before the chip is reset. This programmer makes the whole process much, much simpler. Simply mount the three boards as shown, connect to your PC, and use any of the flashing tools. No need for any other circuitly, manual control, or sequencing. So I don’t need this programmer if I’m only using AT Firmware? You could stay with the default AT Firmware and do without ever having to reprogram the the ESP-01. But there are two reasons you may want to re-program it. Espressif releases a new version of the AT Firmware from time to time. New firmware fixes bugs as well as introduces new features. Although Espressif supplies the pre-built firmware, you still need to reprogram it on your ESP-01. The ESP-01 has lots of free flash memory. The AT firmware occupies only half of the total 1 MB available. You will need to reprogram the ESP-01 if you want to use this unused space to store data for your application. How can I use this on the bread board? Strictly, you don’t need the bottom board for powering and running the ESP-01. Place the ESP-01 on the top board and mount it directly on a bread board. To change your firmware, just pluck it out of the breadboard, place it on the bottom board, flash it, debug, repeat. What about power supply? Supply volatge (3.3-14 V) to the VCC and GND pins as shown in the pinout diagram above. The top board has a built-in regulator that derives 3.3V from your input power supply to power the ESP-01 safely. However, the power supply needs to be able to provide a peak 500 mA, otherwise the ESP-01 will occassionally reset. How is this related to the Witty? The bottom board we use is the same as the Witty bottom board.
By clicking "Accept All Cookies", you agree to the storing of cookies on your device to enhance site navigation, analyze site usage, and assist in our marketing efforts.