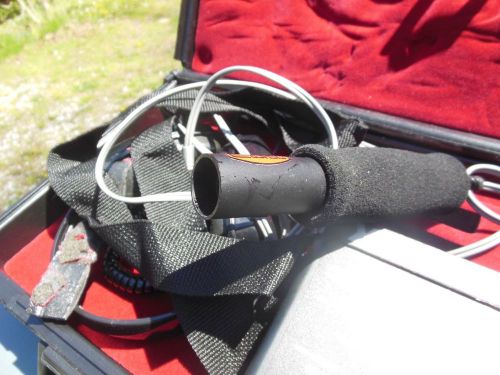
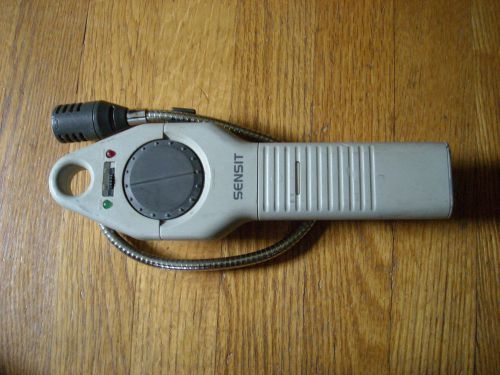
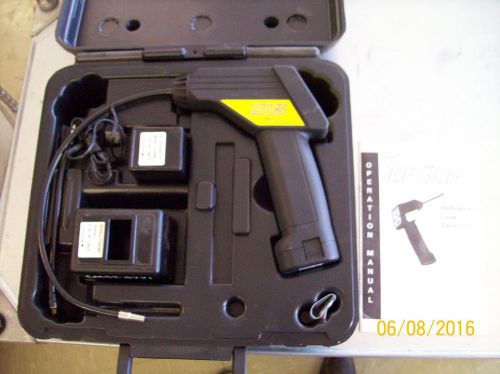
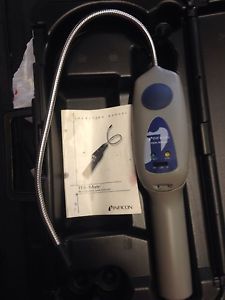
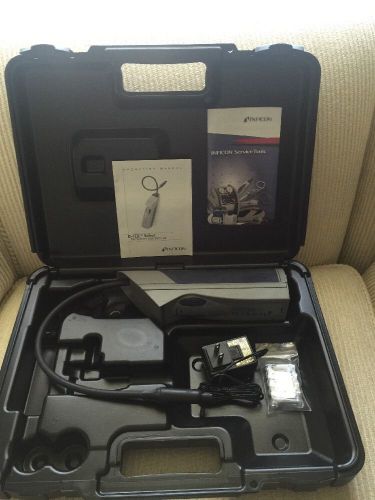
The following is from the Manual As with any new instrument or equipment, you should practice with some known conditions and familiarize yourself with the controls and to know what kind of results to expect. For example, barely turn on an air line to a point where the sound of escaping air cannot be heard. Now, with the FILTER off, point the Ultrasonic Probe at the air valve from one to two feet away. You will notice a hissing sound. Now try it from 4-6 feet away. You will immediately discover how directional the Ultrasonic Probe is. Try sensing the escaping air at further and further distances until you lose the sound. The XLG-80 detects air and other gaseous leaks which are in a frequency range of 38 to 42 KHz. Those higher frequencies are converted to the human hearing range. Many applications for ultrasonic detection come to mind. Examples are pressurized telephone cables, bearing sounds in rotating machinery, valves, both for liquid and gas; electrical discharges such as corona discharge which takes place before the arcing which can be seen; steam traps and general mechanical trouble shooting are other applications. Long before bearings vibrate and get hot, there are changes in the volume of ultrasonic sounds emitted. These sounds are an early warning of bearing failure. If a valve is properly seated, there is no flow hence, no sound. Both liquid and gas line valves emit some ultrasonic frequencies which are detectable when leaking, even in noisy environments. A corona discharge sounds like a buzz or frying bacon. If the discharge is not corrected, there may soon be a destructive arc. Steam traps are virtually always in a noisy environment making "blow-bys" a challenge to detect. Armed with the XLG-80, you may detect "blow-bys", "machine-gunning", over-si zed traps and blockages. To reiterate, there is no substitute for practice in any new discipline. If you practice on some easily accessible known conditions, you should become an expert within a week. I. THE XLG-80 INSTRUMENT SET A. CONTROL BOX: The controls are contained in a sturdy, compact ABS box The function of each control is explained in Section II. Built into the control box is a Loudness Imitation" to protect the hearing of the operator from sudden blasts. B. HEADPHONES: These headphones have been constructed for unusual comfort during long periods of use and for maximum ability to shut out distracting sounds while providing excellent response through the entire frequency range. Using standard 8 ohm stereo headphones instead of the ones supplied with this set, will lessen audio sensitivity. C. CARRYING STRAP: The black strap is snapped to the bracket on the bottom side of the Control Box for carrying around the neck or over the shoulder. This leaves the hands free to move the Probe and to make tuning adjustments during the survey. D. CARRYING CASE: The high impact polypropylene case is lined with foam to securely hold each component during transport. E. ULTRASONIC PROBE: This probe with connecting cord is used to sense ultrasonic noise. , / II. CONTROL BOX A. BATT TEST, MUTE/NORMAL SWITC H: This two position toggle switch is spring loaded in the NORMAL position and allows the set to be on if the Sensitivity knob is turned on, but only if the probe is connected. Pressing the switch up, turns the sound off and shows the condition of the batteries on the meter. B. METER: This analog meter indicates battery condition when the aforementioned toggle switch is pushed up and Sensitivity Knob is in any position but off. The meter also indicates signal strength from sounds. Coil cord or probe must be connected to get any readings on the meter. C. FILTER, ON/OFF SWITC H: When the filter is ON, the Frequency knob controls the input of the sound to the meter and the headphones. The frequency band at the setting of the Frequency knob comes in clear while frequencies above and below the setting are masked or filtered. When the switch is OFF, all sounds and frequencies from less than B to more than J come through equally well. Effectively this is a broad pass or no electronic filtering and the Frequency knob settings have no effect. O. SENSITIVITY KNOB: This knob turns on the set and sets the level of sensitivity. The set cannot turn on however, unless the probe is plugged in at the back of the box. E. FREQUENC Y KNOB: The sett ing point of this kr.ob, when Filter is ON will allow clear percept ion of all input 30unds from the probe for that frequency setting while mask ing or filtering out frequencies above and below the setting. F. HEADPHONE JACK: This female receptacle accepts standard "" stereoheadphone plugs, although sound is monaural. G. PROBE CONNECTION: This female socket, (S pin), is located on the opposite side from the panel and accepts the male connector from the Ultrasonic Probe's connector. I J. GETTING STARTED 1. Attach the carrying strap to the Control box or alternately, put the box on a trouser belt or better yet, a separate belt such as a carpenter's belt. If using the carrying strap, you may wear it around your neck with the box in front of you or over your shoulder, with the box under your armpit. The particular job may dictate the best location and the length adjustment of the strap. 2. Connect the probe at the back of the box and plug the headphone jack fully into the receptacle on the front panel. 3. Turn power on to the zero mark with the sensitivity knob and push BATT TEST toggle switch up and note battery condition. If below the BATT OK, (yellow section on the meted, replace both nine (9) volt batteries. In cold weather, always use alkaline batteries. 4. Put on the headphones and with filter off, turn the Sensitivity knob up to 4 and point the probe with one hand toward your other hand, specifically at your thumb and index finger which you are slowly rubbing together. You should hear the sound of abrasive paper on wood and a corresponding increase in the meter reading. You may increase Sensitivity and listen to the same sound holding the probe at a further distance. 5. Now switch filter on and repeat the above 4 or 5 times with the Frequency Knob at 4 or S different settings. The Frequency Knob selects a narrow band of frequencies within its range of 38 to 42 KHz. The letters B to J are for reference. Frequencies above and below the setting of the knob are quite well masked or filtered out and the frequencies at the setting come through loud and clear. This helps you focus your attention on a narrow band of ultrasonic sound. Probably the two most important things to learn and remember with the XLG-80 are that the probe or transducer is very directional. (By directional, we mean that you must be pointing the tube housing toward the sound source.); and secondly, proper use of the Sensitivity Knob. You do not necessarily want to use Sensitivity all the way up to 10 at all times, because you wiII increase the sensitivity to all sounds unless you narrow the input with the filter on, and slowly rotate the Frequency Knob for the best perception of the sound you are seeking. In the introduction of this manual, we suggested that you slightly turn on compressed air, not enough for anyone to hear with t ho: unaided ear, and point the probe toward the escaping air. You will notice its loudness and the highly directional nature of the probe which will lose the sound if not pointed direct ly at the source. You m ay want to keep a record of sound levels at: different locations periodically, also noting the sensitivity level setting. To be sure that you are not misled, the probe must be held in the same position at the same distance each time a sensing is made to maintain consistency. III. CARE The Fisher XLG-80 is one of the finest detection instruments available and deserves reasonable care to ~,eep it at peak operating efficiency. Always check the batteriE!s before use and keep a spare set handy. Keep all components in the carrying case to prevent loss or damage. SPEC IFIC A TIONS Frequency •••••••••••••••••••••••••• 38 KHz - 42 KHz Listening Frequency. • • • • • • • • • • •• Tuneable 100 Hz - 5 KHz Flat Band 100 Hz - 15 KHz Gain ••••••••••••••••••••••••••••••••••••••• 85 dB Type of Filters •••••••••••••••••• Tuneable and Flat Band Batteries ••••••••••••••••••••• 2 ea. 9 volt (NEDA 1604) Battery Life •••••••••••••• 20 Hours - intermittent use with standard carbon zinc batteries Headset Impedance •••••••••••••••••••••••••• 150 ohms Weight •••••••••••••••••• 4lbs. (in carrying case) (1.8 kg) Size ••••••••••••••••••••••••••••••• (Carrying Case) 9 1 3~" X 10" X 4 inches (34.3 X 25.4 X 10.1 cm)
By clicking "Accept All Cookies", you agree to the storing of cookies on your device to enhance site navigation, analyze site usage, and assist in our marketing efforts.