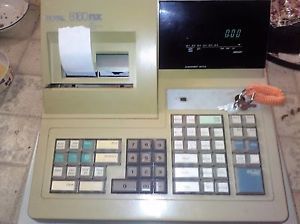
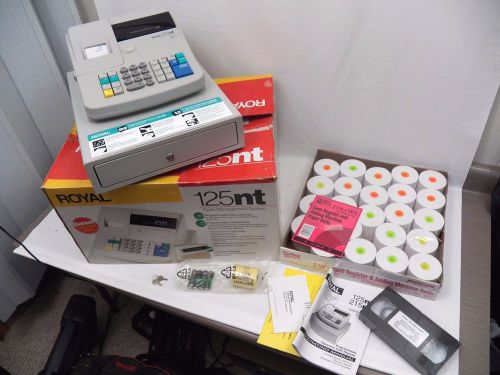
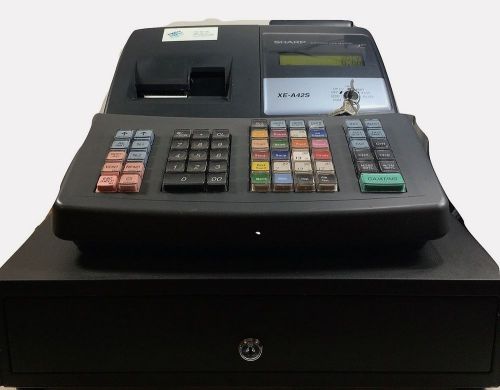
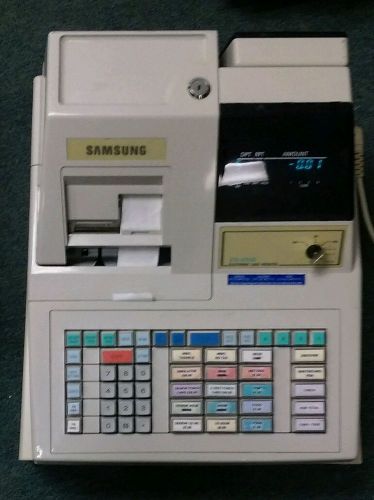
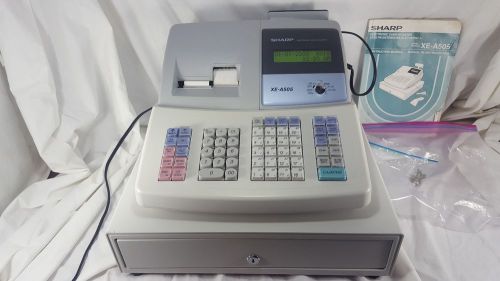
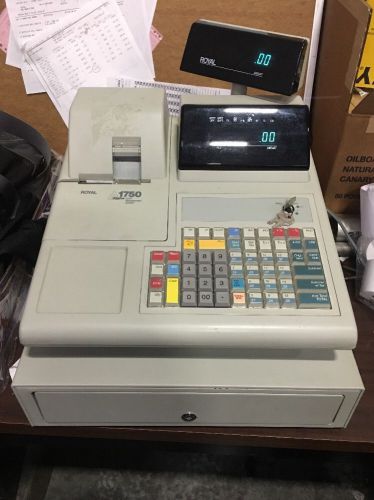
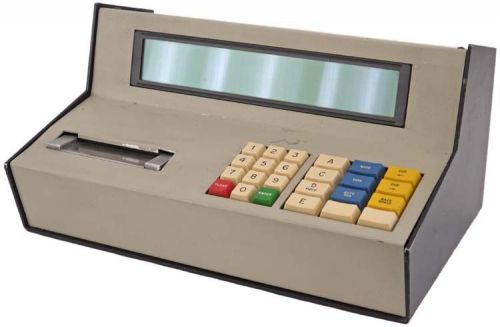
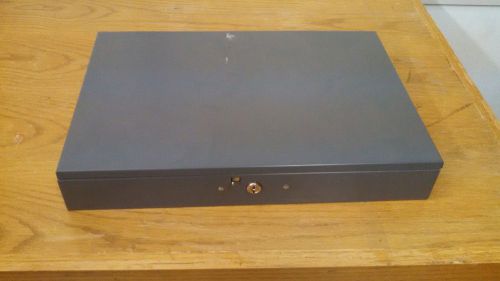
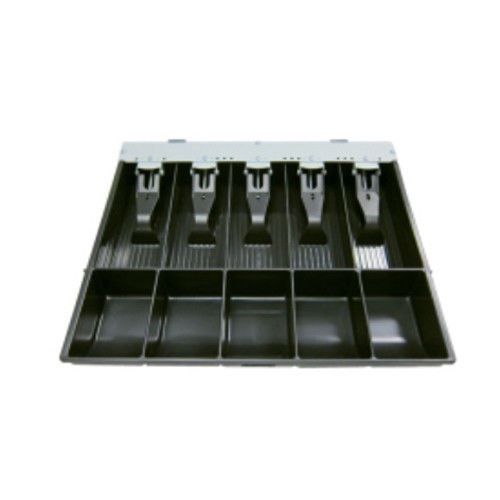
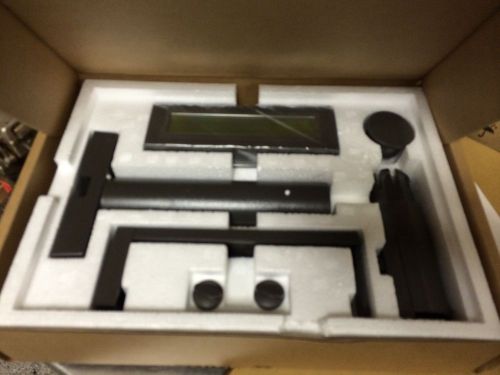
Used cash register. No booklet, but you can download it free online. I have taken a few of the pages and copied and pasted them. The full manual is free to download and I will give you the website. It comes with two sets of keys, 6 keys in all. Two for the register, and 4 that open the drawer. This register works perfectly. It was taken right out of the store. Quick Start is a brief but complete start-up program that allows you to "get started" immediately on the most basic aspects of operating your new cash register. Follow these directions precisely: 1. Read and follow the set-up instructions on pages 1-11. Reminder: It is important that the register is plugged in before the back-up batteries are installed. 2. Install memory back-up batteries, according to the instructions on the previous pages of the manual. 3. Make sure the ink roll is installed in the register (one was installed at the factory); and install the cash register paper roll, according to the instructions on the previous pages of the manual. 4. Perform the following Quick Start programming procedures: A. Slide the control switch to the right to the “PRG” (Program) position. B. Set the current date by typing the current month day and year (mm/dd/yy) using the numeric keys. The month and date must each be entered as a two-digit number; for example, to set March 7, 2006, type [030706]. Finalize by pressing the [#/NS] key. C. Set the current time using the 24-hour clock format. For example: to set 9:15 A.M., type [0915]; to set 7:15 P.M., type [1915]. Finalize this entry by pressing the [qty/time] key. D. Set the decimal point for 2-decimal places (U.S./Canada standard): Type [1], [2] and press the [R/A] key. E. To set a fixed add-on Tax Rate (in the USA): Type [1] for tax rate # 1, then press the [tax shift] key. Then type the tax rate as a 4-digit number. For example, if your tax rate is 8%, type [8000]; if your tax rate is 7.5%, type [7500]. If your tax rate is over 9.999%, then enter it as a 5-digit number, for example 10.5% should be entered as [10500] and 11% would be entered as [11000]. Then press the [amt tend/TOTAL] key. For Canadian Tax users, please refer to the Canadian Tax section of the manual. F. In these examples, we will program the register to accept a zero price; press [8], [1] and then press the [R/A] key. Please note for the next steps you will use the Department Keys, which are the keys numbered 1 through 8 located directly to the left of the [amt tend/TOTAL] key. G. Program Department 1 as taxable items without any preset price. To do this, type the numeric keys [0] [0] [1] to assign Tax Rate #1, press [check], type the price [000] and finalize by pressing the [Department 1] key. Repeat this procedure for all departments you wish to tax with Tax Rate #1. Optional: If you wish to enter preset department prices, replace the [000] with the actual price you would like to program, or see page 18 for details. H. Program Department 2 as non-taxable items with a preset price of $1.99. To do this, type the numeric keys [0] [0] [0] to set as non-taxable, press [check], type the price [199] and finalize by pressing the [Department 2] key. Repeat this procedure to all the departments you wish not to tax. Optional: If you wish to enter different preset department prices, replace the [199] with the actual price you would like, or see page 18 for details. I. Basic programming is now complete. 3. To ring up sales, slide the control switch to the R1 or R2 position (R1 winds a Journal Record on the spindle, whereas R2 gives you Customer Receipts through the window opening, as described fully on page 10). Follow the instructions given in "Transaction Examples", starting on page 28. 4. To print Management Reports, slide the control switch to the “X” or “Z” position as needed, then press the [amt tend/TOTAL] key. Refer to explanation starting on page 37. Once you have mastered the Quick Start operations, you may want to take advantage of other valuable register functions such as Percent Discount Rate, Price Look-Ups (PLU’s) and Security Codes. If you have questions regarding Quick Start or any other aspects of the machine operation, call Royal Customer Service, toll-free, at 1-800-272-6229. HELPFUL HINTS FOR A SUCCESSFUL START-UP GENERAL INFORMATION - It is not necessary to re-program the entire machine to make a single program change or correction. If you wish to make a change, such as update a state tax rate, be sure you are in the “PRG” program mode, then re-do the specific program in question. A new program entry will automatically override a previous entry. The change will also carry through-out the rest of the register programming. For example, if the tax percentage is changed for Tax Rate # 1, after entering the new tax percentage you do NOT have to re-enter or re-program all of the departments linked to Tax #1. All of the taxable departments linked to that tax rate will automatically have the correct, new tax percentage. - Remember; you enter the program mode by moving the Control Switch to the “PRG” position. - Be sure to slide the control switch to the "OFF" position at the end of a business day. - In order to assure continuous battery back-up protection, it is important that the batteries be changed at least once every year. SETTING PROGRAMS __________________________________________________________________ This cash register allows you to set programs customized to your individual business requirements. These programs include: - Setting the Time and Date - Setting the Clerk System - Setting a Percent Discount (-%) Rate - Assigning a Department Tax Status and Pre-set Department prices - Setting a Tax Rate - Creating Price Look-Ups (PLU’s) - Assigning a Security Code for the Program and "Z" Management Report Modes You may set some or all of the programs, depending on your business needs. Once selected, these programs stay in the register's memory until you change them. NOTE: Be sure the memory back-up batteries are installed before setting these programs. SETTING PROGRAMS All programs are set by first entering the “PRG” program mode with the control switch. Then the specific settings are programmed using the numeric keypad [0-9] and appropriate operation or function keys. Program selections appear in the display to verify entry and are printed on the receipt paper for your record. In this section you will find simple step-by-step procedures for each program. Following each procedure is an example. We suggest you complete the examples to become familiar with the program, then reset the programs according to your own requirements. Entering the Program Mode: 1. Set the Control Switch to the "PRG" position. 2. Once in the program mode, you can set some or all of the programs. Exiting the Program Mode: After all the desired programs are set, simply move the Control Switch to the "R1" or "R2" position to begin transactions or turn to the "OFF" position if you are finished. Clearing Errors: If an error tone sounds, press the [C] key to clear the display. Re-enter the program step, correcting the error. If the prompt "SEC Code" appears, this means a security code was programmed. Enter the 4-digit code followed by the [amt tend/TOTAL] key. Then proceed with programming. Note: While you are programming your register, you might shift to R1 or R2 mode to test a feature by running a transaction. If you do not TOTAL the transaction, when you return to the “PRG” mode an error tone will sound. Simply return to R1/R2 and TOTAL the transaction by pressing the [amt tend/TOTAL] key and then return to PRG mode. __________________________________________________________________ Set the date option to print the current date at the top of each receipt, journal record or management report. Set the time option to print the current time at the bottom of the receipt. The time will automatically print and display in military – time (24-hour format). The time prints in the following format: HH•MM. For example: 9:30. If the time is AM, the receipt will print 9-30. If the time is 9:30 PM, then the receipt will print 21-30. There is an internal clock and the date and time change automatically as long as the back-up batteries are installed. Setting the Date: 1. Enter the program mode by sliding the Control Switch to the "PRG" position. 2. Type [the 6-digit number] representing the current date. Use the format MMDDYY to enter the date. NOTE: Single digit numbers for months and days must be preceded by a zero [0]. 3. Press the [#/NS] key to store the date. 4. Continue with the next program or move the Control Switch out of the Program mode. Example: Set a date of March 7, 2006 Type/Press: The Display Shows: The Receipt Shows: 030706 + [#/NS] 307.06 03·07·06 Date Format: The date will automatically print in the following format: MM-DD-YY (Month-Day-Year). For example: 03·07·06. Setting the Time: 1. Enter the program mode by sliding the Control Switch to the "PRG" position. 2. Type [the current time] using the following format: HHMM. The time MUST be entered in 24-hour format (Military time). 3. Press the [qty/time] key to store the time. 4. Continue with the next program or move the Control Switch out of the Program mode. SETTING THE CLERK SYSTEM __________________________________________________________________ The Clerk System allows transactions to be associated with a clerk #. Optionally, there can be a security code assigned to each clerk number. The benefit of the system is that sales can be tracked by clerk; a Clerk Report captures the number of transactions and sales for each Clerk number. There are a few steps to set up the Clerk System. 1. Activate/Disable the Clerk System 2. Determine whether Clerk #’s are required to be entered with or without a security code 3. Assign the security code to each Clerk # Activate/Disable the Clerk System: 1. If needed, enter the program mode: Move the Control Switch to the "PRG" position. 2. Type [44444] 3. Enter either [0] or [1]: [0] disables the Clerk System; [1] activates the Clerk System. 4. Press the [amt tend/TOTAL] key to finish. Assign Clerk # and Security Code Entry: 1. If needed, enter the program mode: Move the Control Switch to the "PRG" position. 2. Type [11] 3. Enter either [0] or [1]: [0] Clerk # only; [1] Clerk # and 3-digit security code. 4. Press the [R/A] key to finish. NOTE: if you set the register to require security codes to be entered after the Clerk #, then you MUST program or set a security code for all Clerk #’s used. Otherwise, clerk numbers without security codes assigned to them will not be accepted and will result in an error when entered. To Assign a Security Code to Clerk #: 1. If needed, enter the program mode: Move the Control Switch to the "PRG" position. 2. Type [444444] 3. Press the [amt tend/TOTAL] key 4. Enter the Clerk #: [1], [2], [3], [4], etc. 5. Enter the security code: any 3-digit number between 001 and 999, examples: 123, 222, 212, etc. 6. Press the [clerk] key 7. Repeat steps 4, 5 and 6 for each Clerk # you want to have a security code. 8. Press the [C] key to finish. To re-program a clerk number with a new security code, just repeat the instructions above using the new security code in step #5. To reset a clerk # with no security code, complete steps 1 through 8 skipping step # 5 (do NOT enter anything for the security code). This will erase the security code assigned to that clerk #. However, please remember, that if the cash register is still set to require security codes, then any clerk # without a security code cannot be used. Using the Clerk Feature Before entering a transaction, press the single-digit number on the numeric keypad followed by the [clerk] key to record transactions under that Clerk number. If a security code is required with the Clerk number, enter the clerk number and the 3- digit security code and then press the [clerk] key. A Clerk number is only required when the register is first set to the R1 or R2 modes after being “OFF”. After that, the register will not ask for a clerk # at the beginning of every transaction. However, a new clerk # and security code, if programmed, can be entered optionally at the beginning of any transaction; and the register will record that transaction and all future transactions (until the clerk number is changed again) under that clerk number. _ZERO PRICE ENTRY SETTING This procedure allows a price of zero ($0.00) to be entered for a department or PLU price during set-up programming. The default setting does not accept a "0" price. 1. Enter the Program mode: Move the Control Switch to the "PRG" position. 2. To allow zero price entry, type [8], then [1], followed by the [R/A] key. 3. To prohibit zero price entry, type [8], then [0], followed by the [R/A] key. Please note this is the default setting. TO PROGRAM DEPARTMENTS AS TAXABLE 1. Enter the program mode. Move the Control Switch to the "PRG" position. 2. Select Multiple Sale or Single Item Sale: Type [0] or [1] 0 = Multiple Item Sales 1 = Single Item 3. Type [2-digit #] from the Tax Rate Chart above. 4. Press the [check] key. 5. Enter the Pre-set Price using the [number keys], be sure to include the cents (for example, for a $3 pre-set priced item you must enter 300). If you do not wish to program a department pre-set price, enter "0". 6. Press the appropriate [DEPARTMENT] key. Repeat these steps for each department you will be using. Example: Program Department 1 as multiple item sales, taxable using Tax Rate 1, and with a pre-set price of $1.99 Example: [0] + [01] + [check] + [199] + [Department 1] TO PROGRAM DEPARTMENTS AS NON-TAXABLE 1. Enter the program mode. Move the Control Switch to the "PRG" position. If a security code has been assigned, enter the security code and press the [charge] key. If no security code has been assigned, continue with Step #2. 2. Type [0] for Multiple Item Sale, then type [00] for no tax. Press the [check] key. 3. Press [0] for no pre-set price, then press the [DEPARTMENT 2] key. Example: Program Department 2 as multiple item sales, non-taxable, and with no pre-set price (a zero price): __________________________________________________________________ SECURITY CODE: For Program and Management Report Protection Management Reports can be printed in either the "X" or "Z" positions on the Control Switch. When printed in the "Z" position, transaction totals are reset to zero. Assigning a security code can prevent accidental reset of transaction totals. Once assigned, the "Z" report prints ONLY after entering the security code. NOTE: Assign a number easily remembered. You should also keep the program receipt as a reminder. If you do forget the code, you can reset the code by repeating this programming procedure below with a new code. Then, print the report using the new code. Assigning a Security Code: 1. Move the Control Switch to the "PRG" position. 2. Type (the 4-digit number) representing the security code. (A 4-digit number must be used. Four zeroes cannot be used). 3. Press the [charge] key to store the code. Example: Assign a security code of "7748": Type/Press: The Display Shows: The Receipt Shows: 7748 + [charge] 77.48 77.48 CH NOTE: IF YOU SET A SECURITY CODE, YOU WILL NOT BE ABLE TO PRINT YOUR “Z” MANAGEMENT REPORTS UNTIL YOUR SECURITY CODE HAS BEEN ENTERED. THE PROMPT "SEC CODE" WILL APPEAR IN THE DISPLAY TO REMIND YOU TO ENTER THE CODE. Delete a Security Code: 1. Move the Control Switch to the "PRG" position. 2. Type [0 0 0 0]. 3. Press the [charge] key. Using a Security Code in the "Z" Mode: 1. To print a "Z" report at the end-of-the-day when a security code has been assigned, move the Control Switch to the "Z" mode. 2. Type the [4-digit security code]. 3. Press the [amt tend/TOTAL] key. 2. The "Z" report will print. SETTING THE DECIMAL POINT To set 2-decimal place (standard in the U.S.): 1. Move the Control Switch to the "PRG" position. 2. Type the number [1]. 3. Then type [the number] of decimal places you need the register to use (see chart below). 4. Press the [R/A] key. THE SAME PROCEDURES APPLY FOR OTHER DECIMAL SETTINGS AS FOLLOWS: [0] = NO decimal places = 0. (whole numbers only) [1] = ONE decimal place = 0.0 [2] = TWO decimal places = 0.00 (Standard setting for U.S. & Canada) [3] = THREE decimal places = 0.000 26 __________________
By clicking "Accept All Cookies", you agree to the storing of cookies on your device to enhance site navigation, analyze site usage, and assist in our marketing efforts.