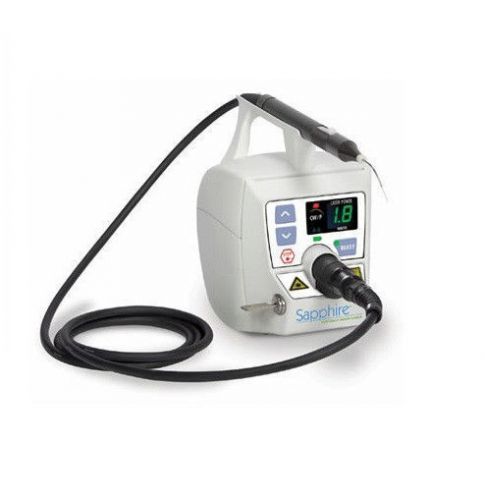
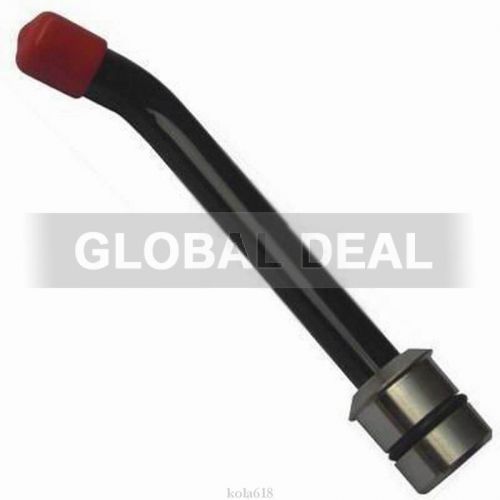
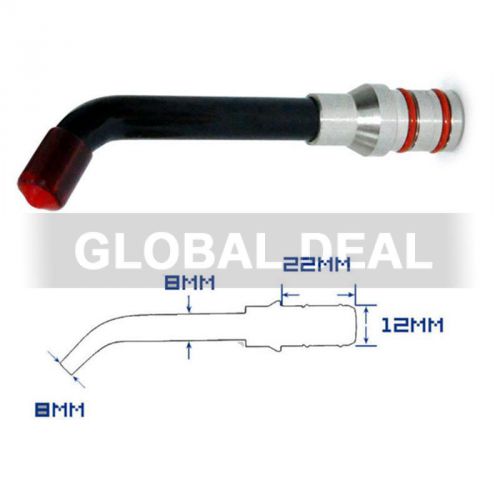
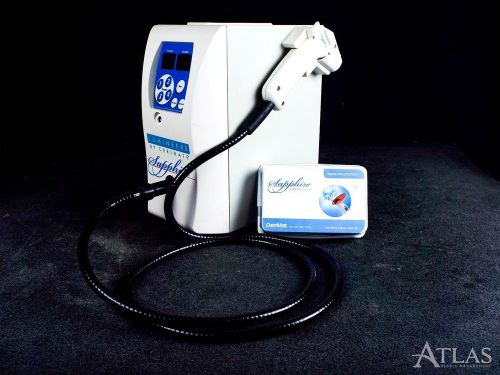
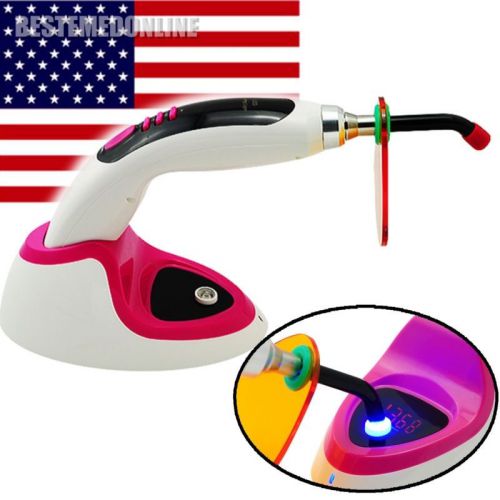
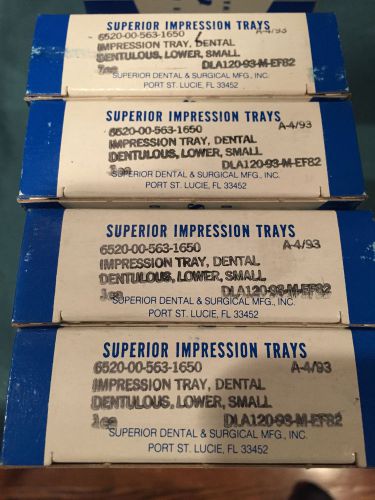
Sapphire Portable Diode Laser You can't afford to practice without it. Compact. Easy-to-use. Affordable. The Sapphire Portable Diode Laser makes the benefits of laser dentistry available to more patients than ever before. Bring this powerful technolgy to your practice and experience the future today. The ideal laser for both a first-time user and the seasoned dental laser practice. 3 watts continuous wave output, with 5 watts peak pulse power, 808 nm wavelength. Disposable tips - No stripping or cleaving. Portable, with a long use battery. Finger-touch control, with an optional foot pedal. The Sapphire® Portable Diode Laser unit is a dental soft-tissue laser surgical/debridement device. The Sapphire Portable Diode Laser may be used for a variety of soft-tissue, gingival modification, and sulcular therapy procedures. The Sapphire Portable Diode Laser is indicated for use in dental intraoral soft tissue general, oral maxilla-facial and cosmetic surgery including ablating, incising, excising, vaporizing and coagulation of soft tissues using a fiber optic delivery system. Indications include: Excision and incision biopsies Hemostatic assistance Treatment of apthous ulcers Gingival incision and excision Gingivectomy Gingivoplasty Gingival troughing Gingival recontouring Tissue retraction for impressions Oral papillectomy Sulcular debridement Sulcular tissue removal Removal of granulation tissue Frenectomy Frenotomy Abcess incision and draining and excision Operculectomy Removal of fibromas Soft tissue crown lengthening Vestibuloplasty 1 YEAR MANUFACTURER WARRANTY Gingival Contouring with the Sapphire® Portable Diode Laser: Tip: Initiated Mode: Continuous Wave Power: 0.8 W Anesthesia: Local, as required Technique: Contact After anesthesia is profound, insert a periodontal probe into the sulcus down to the crest of the bone Measure that depth from the crest of the gingiva to the bone. Note the reading and reduce it by 2.5 mm. Make a stick mark in the facial gingiva at a point 2.5 mm above the crest of the bone. Always leave 2.5 mm or more of gingival tissue above the crest of the bone when performing a soft tissue contouring procedure so as to not infringe upon the biological width of the tooth. Angle the tip slightly toward the incisal and make a series of 2-3 mm quick strokes with the fiber tip as you remove tissue and establish the new line for the crestal gingiva. Gingivectomy, Gingivoplasty and Papillectomy with the Sapphire Portable Diode Laser: Tip: Initiated Mode: Continuous Wave Power: 1.0 W Anesthesia: Local, as required Technique: Contact 1. Using a periodontal probe, record the depth of the pocket to be treated and evaluate its condition, either acute or chronically inflamed. 2. If there is no apparent exudate present, use the periodontal probe to define the height of contour that is to be establish. 3. With the patient anesthetized, carefully place a stick mark along the facial aspect of the gingiva to create a reference for the incision path. 4. With the Fiber Optic Tip angled slightly toward the occlusal or incisal, remove the diseased tissue down to the previously marked incision line. 5. If necessary to achieve desired results, increase power level but always use the lowest amount of power necessary to reach the treatment objectives and avoid charring tissue. 6. Taper and festoon the crestal gingiva as needed and then quickly remove the diseased epithelium and restore anatomical contour. Note: Remember to avoid touching the root whenever possible and move quickly while near the bone or root. 7. Flush the pocket using a warm saline solution or hydrogen peroxide. 8. Record power settings used and treatment times in the patient’s chart. Gingival Troughing & Tissue Retraction for Impressions with Sapphire® Diode Portable Laser: Tip: Initiated Mode: Continuous Wave Power: 0.8 W Anesthesia: Topical or Local, as required Technique: Contact 1. Following preparation of the tooth, cleanse the area (optional) with H2O2 and then rinse with a light spray of water. 2. Air dry with low volume flow of air. 3. Lightly contact the sulcus lining just inside the crest of the gingiva, angling the Tip away from the tooth. 4. Using very light pressure, begin lasing as you make small paint brush-like strokes tracing the area of the tooth that needs to be exposed or where the restoration margins are not completely visible. 5. If necessary to achieve desired results, increase power level but always use the lowest amount of power necessary to reach the treatment objectives and avoid charring tissue. 6. Create a small trough between the tooth and gingiva. This will allow you to achieve a high quality optical image, scan or impression. 7. You may also choose to recontour abnormal gingival tissue to achieve better esthetics in a fraction of the time with greater precision for outstanding results. Sulcular Debridement with the Sapphire Portable Diode Laser: Tip: Initiated Mode: Pulsed Power: 0.8 W Anesthesia: Topical or Local, as required Technique: Contact Time: 30 seconds Technique: Contact 1. After conventional instrumentation has been completed, insert the fiber tip to the full pocket depth. 2. Gently probe the pocket to get a sense of its geometry. 3. Begin lasing onto the diseased epithelial lining. 4. If necessary to achieve desired results, increase power level but always use the lowest amount of power necessary to reach the treatment objectives and avoid charring tissue. 5. Keep the Fiber Optic Tip parallel to the root surface or tilted slightly toward the gingival tissue during treatment in order to maximize ablation of the inflamed tissue. 6. While keeping the Fiber Optic Tip in contact with the epithelium, move the Fiber Optic Tip in both horizontal and vertical directions, covering the epithelium and adjacent inflammatory connective tissue. Move the Tip smoothly and at a moderate speed. Debride all granulation tissue. • You may use a fine water spray during laser treatment for rinsing. • Remove plume and debris with high volume evacuation. • The total amount of time for this procedure is a function of the extent of the diseased soft tissue. In general, treat pockets 6 millimeters or less for approximately 30 seconds and pockets greater than 6 millimeters for 45 seconds. • If the patient experiences noticeable discomfort, lower the power setting. Anesthetic may be administrated as required. Labial Frenectomy with the Sapphire® Portable Diode Laser: Tip: Initiated Mode: Continuous Wave Power: 1.0 W Anesthesia: Local, as required Technique: Contact The procedures to relieve the frenum will differ for three basic areas: 1) Mandibular frenum – labial or buccal; 2) Mandibular frenum – lingual (tongue-tied relief); 3) Maxillary frenum – labial and buccal. Mandibular labial frenum attachments: 1. Place tension on the frenum by retracting the lip or cheek. 2. Beginning at the base of the attachment to the gingival tissue, make an incision with the Sapphire Portable Diode Laser that is perpendicular to the length of the frenum. 3. If necessary to achieve desired results, increase power level but always use the lowest amount of power necessary to reach the treatment objectives and avoid charring tissue. 4. Using continued tension, extend the incision until you are nearing the periosteum. Note: Do not cut into or damage the periosteum. 5. The incision may need to extend laterally when there is a wide attachment. 6. Wipe the debris from the hard and soft tissues using hydrogen peroxide or warm saline solution. Note: Sutures are usually not required. Lingual frenum: Lingual frenum relief must be approached with caution to ensure that you do not inadvertently rupture or incise the rich vascular beds in the floor of the mouth and the inferior border of the tongue. • Grasp the frenum with a hemostat near the attachment to the tongue and use a hemostat to protect the vascular complex as the incision is made and the frenum released. Maxillary labial frenum: • Grasping the lip, place tension on the frenum and begin to make a perpendicular incision at the most coronal aspect of the attachment to the gingiva. • With continued tension, release the frenum fibers as you are moving apically. NOTE: Do not perforate or incise the periosteum. Release all fibers down to the frenum attachment to the periosteum. • A diamond shaped surgical area will indicate that you have released the attachment. • Use warm saline rinses to clean the area. Abcess Excision with the Sapphire Portable Diode Laser Tip: Initiated Mode: Continuous Wave Power: 1.0 W Anesthesia: Topical or Local, as required Technique: Contact 1. Determine the status of the lesion, chronic or acute, and select a site to enter the parulis of the infection. 2. Based on the lesion status, enter the lesion by placing the fi ber tip at the most coronal spot on the parulis and with short strokes, make an incision to establish a drainage path. 3. Using high volume suction, irrigate the area with saline solution as the exudate appears. 4. Insert the tip into the incision site without emitting energy and lightly probe the area inside the parulis as you advance the tip apically. 5. Once you have established the base of the parulis, back the fi ber optic (therapy) tip out approximately 2 mm and activate the Sapphire Portable Laser as you slowly withdraw the tip. 6. Remove the tip briefl y and allow any exudate to drain. 7. After draining has slowed, re-enter the parulis and insert the Fiber Optic Tip just short of the base and then withdraw the Tip as the laser is activated. 8. Repeat the process until you have established a clear path for completing the remaining drainage. 9. Administer oral antibiotics as needed and give the patient instructions on using warm saline to cleanse and irrigate the oral environment. 10. If you are not able to complete the drainage procedure without pain, review basic protocols before administering a local anesthetic into the infected area. Hemostasis with the Sapphire® Portable Diode Laser Tip: Uninitiated Mode: Continuous Wave Power: 1.0 W Anesthesia: Topical or as required Technique: Non-Contact Place the Fiber Optic Tip 2 mm above the gingival sulcus, in noncontact with tissue. Direct energy into sulcus and away from the dentin and cementum. • Active the laser as you make a series of 2 – 3 mm strikes while circling the tooth. This should take about 30 – 40 seconds. NOTE: Do not stop the movement of the fiber tip until you have reached the starting point again and do not contact the tissue. • Examine the sulcus and see if you have hemostasis or if the ‘oozing’ has slowed. • Repeat in 30 second intervals if hemorrhage persists. • If bleeding continues after the second attempt, clean any excessive hemorrhage and lase for a third time. Do not exceed 11/2 minutes of lasing care. NOTE: Continued bleeding indicates that you may have a larger arteriole that requires other hemostatic assistance in order to control. Certified Dental Supply – We guarantee the lowest price Send us your order list to get quote Fax # is 973-667 0292 Feel free to combine shipping with other items we have. Please, check our eBay YOUR #1 DENTAL SUPPLIER
By clicking "Accept All Cookies", you agree to the storing of cookies on your device to enhance site navigation, analyze site usage, and assist in our marketing efforts.